Concrete Work
 How to Finish Concrete
There's more to concrete than just pouring it out and watching it harden. Here’s what you need to know to shape and smooth fresh concrete into an attractive, long-lasting surface. Try to move quickly except where noted otherwise so you can finish before the concrete dries, especially on a hot day.
Part 1 of 3: Initial Leveling
1. Pour the concrete. If you are unfamiliar with pouring concrete, follow the linked instructions to ensure you do so correctly. Be ready to move on to the next steps as soon as you pour.
2. Compress the concrete only if necessary. Many modern concrete mixes do not need to be compressed, or "tamped", before finishing, and tamping the wrong mix can weaken the slab. Confirm your decision with a professional before tamping.
- If you do decide to tamp, simply press the concrete down using any variety of tamping tool (hand, rolling, etc.).
3. Place a 2x4 across the concrete. Find the straightest lumber 2x4 you can find and place it across the barriers holding the concrete in place, or "forms". The 2x4 should extend at least a foot past the forms in each direction. This object is referred to as a screed board.
4. Use the 2x4 to level the concrete. Using the technique described below, move the 2x4 down the forms to remove excess concrete.
- Use a sawing motion to pull and push the 2x4 across the concrete as you move it down the length of the forms. This sawing motion helps prevent tearing as you level the surface.
- Tilt the leading edge slightly away from the direction of travel to create a thin cutting edge where the screed board meets the concrete.
- Keep at least a 1 inch (2.5cm) hump of concrete in front of the edge at all times. This will fill any holes in the concrete's surface.
- Pour and level in stages for larger projects.
- At the end of the slab, push the excess concrete against the forms for easy removal with later tools.
Part 2 of 3: Finishing, Stage One
1. Immediately level and prepare further using a bull float. The bull float is a flat, long-handled tool used to flatten minor ridges and holes, as well as embed aggregate particles further into the concrete, bringing the smoother "cream" consistency concrete to the surface for better finishing.
- Move the bull float back and forth across the slab, perpendicular to the direction you moved the leveling board. (In other words, move the bull float between the two forms the 2x4 was resting on.)
- Slightly lift the leading edge to create a smaller cutting edge of contact, lifting the tool toward you when pushing and away from you while pulling. Don't overdo it; the edge of the tool should remain level with the concrete.
- Try to finish this process before any "bleed water" leaks out onto the concrete's surface.[4]
2. Use an alternative tool (optional). A darby is a short-handled tool that serves the same purpose as a bull float for smaller projects. A "power float" or "helicopter" is a powered tool used on large projects.
- Move the darby back and forth in overlapping arcs until the whole surface has been covered twice.
- A power float requires two people to place it carefully onto the slab, but only one to operate it. It takes a little practice to work properly, so stay near the center of the slab while you're learning to avoid damaging the concrete's edge.
3. Tidy the corners using a smaller tool. An edging tool is designed to create level edges and corners next to the form, where your larger bull float or darby is less accurate. This will create more durable edges as well as improve the concrete's appearance.
- Use a back-and-forth motion in a 1- to 2-ft. (0.3–0.6m) area before moving on to the next. As with previous tools, lift the leading edge of the tool.
- Don't press too deeply into the concrete; this can create impressions that are difficult to remove.
4. Cut grooves into your concrete. These are called control joints and direct the concrete's inevitable cracking in such a way that appearance and functionality are minimally affected. These should cut 25% of the way through the concrete's depth.
- The distance between joints should be no more than 24 times the thickness of the slab.[9] If you are working in the imperial system, calculate this by doubling the thickness of your slab in inches and using that measurement as feet. (For instance, a 4" (10 cm) slab should have joints no more than 8' (2.4m) apart.)
- Every inside corner of your slab and every corner that touches a building or step should have a control joint extending from it, as these are common cracking locations.
- Use a straightedge or snap line to lightly mark the joints before cutting and keep your tool straight as you cut.
- A grooving tool works well for most projects. If your concrete has already started to dry and crack, use a dry-cut saw that can cut to the desired depth. For extra large projects, use a long-handled marking tool.
5. Wait for the concrete to partially dry. It takes experience to learn the correct timing for concrete, since its drying speed depends on many factors such as the characteristics of the mix and the local temperature and humidity. Here are the basic details:
- As the concrete sets, excess "bleed water" will rise to the surface. Wait until this water has evaporated and the wet shine of the concrete has started to disappear.
- If the concrete is still quite wet and forms ridges when you move on to the next step, wait longer.
- If the concrete becomes too hard and dry to finish properly, throw additional water onto its surface. This is a last resort as it will result in weakness and scaling in the final slab.
6. Apply a color hardener (optional). If you are coloring your concrete using a powder that adds color to the top layer, apply this in the amount specified on the label while the concrete still has a full wet shine. It will still require a little more drying before you proceed to the next stage.
- Only use on horizontal surfaces and with proper safety equipment to avoid inhalation.
Part 3 of 3: Finishing, Stage Two
1. Smooth and compact the surface once again with a hand float. This is the final smoothing, bringing the more consistent "cream" of the concrete to the surface for a level, durable finish. Different materials will provide different effects:
- Magnesium floats are very popular among professionals, since they are lightweight and excellent at opening up the concrete's pores for evaporation.
- Aluminum floats are very similar to magnesium, but somewhat heavier and stronger (and so a little more difficult to handle).
- Wooden floats (redwood or hardwood) are cheap but wear out quickly. They create a rough fuzzy surface useful for very stiff concrete or if using colored hardeners (which need to be mixed in with the rougher tool).
- Laminated-canvas resin floats are used for the same purposes as wood but are a much more durable (and expensive) tool.
- As before, lift the leading edge slightly and make shallow flat motions across the surface.
2. Consider a trowel finish. Many people skip troweling if they plan to broom, as it only results in minor improvement in that scenario. Troweling without brooming results in a very slick surface (unsafe for surfaces that will get wet) and may cause fine cracks to develop called "crazing".
- Use a magnesium trowel in much the same way you used previous finishing tools. You can create a very smooth finish by passing over the slab two or three times, waiting for the concrete to dry slightly between passes and lifting the leading edge a little more each time.
- Steel trowels can also be used, but inexpert timing could cause the steel to trap water inside the concrete and damage it.
- Troweling too deep or troweling "air-entrained" concrete mixes can release the concrete's air bubbles and prevent it from setting correctly.
- Larger troweling tools (or other long-handled finishing tools) are sometimes referred to as "fresnos". These are handy for reaching the center of large slabs. Alternatively, use a hand trowel but kneel on wooden boards when you need to be on the slab to prevent leaving deep impressions.
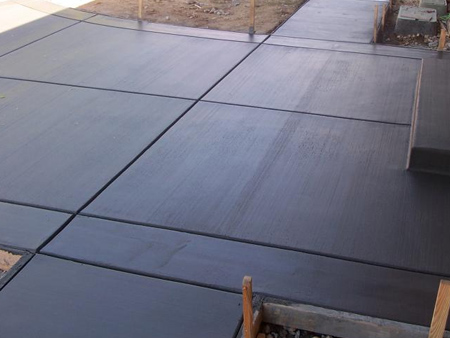
3. Try a broom finish. Most people end with a broom finish to create a non-slip surface. You can do this with or without a preceding trowel finish.
- Use a medium stiff or stiffer shop broom (the wide rectangular kind). The bristles should be stiff enough to leave noticeable marks, and the concrete should be soft enough to be shaped by them but hard enough to retain them (not sinking back together).
- Dip the broom into a bucket of water, then shake off the excess (not onto the concrete).
- Drag the broom gently over the concrete in segments. Overlap the previous segment to ensure full coverage.
- If the surface is intended to drain, create the grooves in the direction liquids are supposed to flow.
4. Cure the concrete. The final drying process of concrete takes several weeks, and if "cured" at the correct rate minimizes the chance of later damage.
- The simplest method is to wet the concrete's surface and cover it with plastic sheeting. Weigh down the sheet's edges with heavy objects.
- There are many other ways to keep the concrete wet, but these tend to require more water or maintenance than plastic.
- Concrete curing chemicals are often used for professional jobs. These come in many varieties, so consult someone familiar with your concrete mix for advice on selecting one.
- Begin curing as soon as possible. Once begun, keep off foot traffic for 24 hours, light vehicles such as bicycles for 1 week, and car traffic for 2 weeks. Complete curing takes at least 30 days, and longer at the corners and edges.
5. Seal the concrete. After the concrete has cured for at least a month, use a concrete sealer to make it resistant to liquid damage and easy to clean.
- Clean the slab well before applying sealant.
- Apply thinly to avoid puddles. If needed, wait a couple hours (or as the label instructs you), then apply a second layer perpendicular to the first.
- Allow sealant to dry completely before walking over or placing anything onto the concrete. Wait three days before allowing vehicle traffic.